Develop a Vanus Connector with cdk-java

A Vanus connector is a software component that allows different systems or applications to communicate with the Vanus event platform. Connectors enable data to be easily and efficiently exchanged between different platforms, making it possible to integrate and automate business processes.
The Vanus community is currently seeking developers to assist in the creation of new connectors and the improvement of existing ones. To support this endeavor, the community has developed two Connector-Development Kits (CDKs) and accompanying code templates that can be utilized to streamline the development process and eliminate the need to start from scratch.
This article outlines the definition of the Vanus Connect and introduces the various tools available to aid developers in the creation of new connectors. It also provides detailed instructions on how to use the provided templates to develop a connector.
Table of Contents
- About Vanus
- Pre-requisite
- How to write a connector for vanus
- How to use Java Source Template
- How to use Java Sink Template
- Conclusion
About Vanus
What is Vanus
Vanus is a Serverless, event streaming system with processing capabilities. It connects SaaS, Cloud Services, and Databases to help users build next-gen event-driven Apps.
What is Vanus Connect
With Vanus Connect, users can effortlessly sidestep the complexities of integrating with external services through the use of pre-built connectors. Acting as a proxy between external services and the user’s system, each connector streamlines the integration process and eliminates the need for extensive coding. Vanus offers a wide range of connectors for popular sources and sinks, such as databases, cloud services, SaaS applications, and more, ensuring that users have access to the necessary tools for a fast and efficient integration process. There are two types of connectors of Vanus:
-
A source connector is responsible for retrieving data from an underlying data producer and delivering it to designated targets in the form of CloudEvents. The method in which a source connector retrieves data is not limited, as it can retrieve data from various sources, including message queues or by acting as an HTTP server, waiting to receive data.
-
A sink connector is responsible for receiving CloudEvents and executing specific business logic. For example, a MySQL Sink connector may extract pertinent data from CloudEvents and write it to a MySQL database.
Why should you write connectors for Vanus
Vanus is an open-source event streaming, which means that it is freely available for anyone to use and modify. However, while the core Vanus system provides a powerful and flexible platform for processing and delivering events, it may not include all of the connectors that are needed to integrate with various systems and applications.
This is where open-source contributors can play a valuable role. By writing connectors for Vanus, they can enable integration with a wide range of different platforms and systems, making it easier for developers to exchange data between different applications and services.
Contributors to Vanus can benefit from the exposure and recognition that comes with contributing to a popular open-source project, as well as the opportunity to improve their skills and gain experience in developing enterprise-level software.
Pre-requisite
- A GitHub account.
- Developers are familiar with Golang or Java to use our cdks.
How to write a connector for vanus
Here are the steps you can follow to write a connector for Vanus.
- Step 1: Identify the connector you want to write
- Step 2: Submit your connector proposal
- Step 3: Implement your connector logic
Step 1: Identify the connector you want to write
Before start contributing, you should determine the system or application that you want to integrate with Vanus, and the type of connector that you want to write.
Find the connector you are most interested in from vanus connect issues.
Step 2: Submit your connector proposal
Write your own connector proposal based on source/sink proposal examples in the vanus-connect/proposals directory.
The proposal should introduce how a developer plans to implement the connector in detail.
Contributors should not start coding before the proposal PR has been approved and merged.
Step 3: Implement your connector logic
Vanus Connect currently provides two CDKs (Connector-Development Kits) and code templates to use them so developers can avoid starting from scratch.
You can choose a code template according to the type of connector you’d like to write and the programming language you prefer to use.
How to use Java Source Template
Project structure of the Java source template
Below is the structure of the Java Source Template.
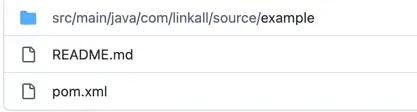
  source-java
  ├── src/main/java/com/linkall/source/example/         // store the source codes of the connector
    ├── Entrance.java                                   // the entrance of the connector cotaining main method
    ├── ExampleConfig.java                              // deal with the custom configuration required by the connector
    ├── ExampleSource.java                              // store implementaion of the core logic codes
    ├── SecretConfig.java                               // deal with the secret configuration required by the connector
How to add custom configs in the source template
The connector needs to read configs from the user. You should add custom configurations in the ExampleConfig.java.
public class ExampleConfig extends SourceConfig {
  @JsonProperty("username")
  private String username;

  @JsonProperty("password")
  private String password;

  public String getUsername() {
    return username;
  }

  public String getPassword() {
    return password;
  }
}
The codes above requires users to provide two custom configs username and password. The cdk-java will try to find two fields with keys username
and password in aconfig.yml file. And assign them to the corresponding fields defined in the above struct exampleConfig.
How to Generate a CloudEvent in the template
Typically, the source connector needs to convert the original data into a CloudEvent and send it to the target.
In the template, you just need to implement the makeEvent method.
public CloudEvent makeEvent(int i) throws JsonProcessingException {
    CloudEventBuilder template = CloudEventBuilder.v1();
    template.withId(UUID.randomUUID().toString());
    URI uri = URI.create("testSource");
    template.withSource(uri);
    template.withType("testType");
    template.withDataContentType("application/json");
    template.withTime(OffsetDateTime.now());
    Map<String, Object> data = new HashMap<>();
    data.put("number", i);
    data.put("string", "Event Num " + i);
    template.withData("application/json", objectMapper.writeValueAsBytes(data));
    return template.build();
}
The code above use CloudEvents SDK to create an empty CloudEvent. Then assign mocked values into the event. You can choose
to obtain data from an underlying data producer here. And use the obtained data to construct a CloudEvent in the makeEvent method.
How to deliver a CloudEvent to the target in the template
Once you successfully constructed CloudEvents in the makeEvent method, you need to deliver them to a specific target.
Luckily, our cdk did that for you.
public void start() {
      executor.scheduleAtFixedRate(() -> {
        try {
            CloudEvent event = makeEvent(num++);
            queue.put(new Tuple(new Element(event, null), () ->
            LOGGER.info("send event success {}", EventUtil.eventToJson(event))
            , (success, failed, msg) -> LOGGER.info("send event failed:{}, {}", msg, EventUtil.eventToJson(event))));
        } catch (Exception e) {
            LOGGER.error("error", e);
        }
      }, 3, 10, TimeUnit.SECONDS);
}
The start method will repeatedly invoke your makeEvent method, and deliver the generated CloudEvent to
a Java BlockingQueue. Another Java thread will constantly check if there is an event in that queue. If there is, then it will
send it to the target.
How to use Java Sink Template
Project structure of the Java sink template
Below is the structure of the Java Source Template.
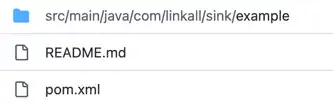
  source-java
  ├── src/main/java/com/linkall/source/example/         // store the source codes of the connector
    ├── Entrance.java                                   // the entrance of the connector cotaining main method
    ├── ExampleConfig.java                              // deal with the custom configuration required by the connector
    ├── ExampleSink.java                                // store implementaion of the core logic codes of the connector
How to add custom configs in the sink template
Same as how the source template does it.
How to deal with the incoming CloudEvents
Typically, the sink connector needs to extract useful data from the incoming CloudEvents and do some specific logics.
In the template, you just need to implement the Arrived method.
@Override
public Result Arrived(CloudEvent... events) {
        // TODO
        for (CloudEvent event : events) {
            int num = eventNum.addAndGet(1);
            // print number of received events
            LOGGER.info("receive a new event, in total: " + num);
            LOGGER.info(EventUtil.eventToJson(event));
        }
        return null;
}
The code above simply prints the incoming CloudEvents in JSON format. You can implement your business logic to deal with the incoming CloudEvents.
Conclusion
This blog talks about the definition of the Vanus Connect. And how developers can use the cdk-java and the Java template to write a connector.
Feel free to join the Slack community to discuss how to write or use a connector with global developers.